Reading this page will help you learn new terms for ceramic processes.
You can understand their meaning used in context with images to help.
Links to reference videos are provided to help gain further knowledge on specific processes.
An interactive crossword at the bottom of this page will help you assess your understanding of these new terms.
You can understand their meaning used in context with images to help.
Links to reference videos are provided to help gain further knowledge on specific processes.
An interactive crossword at the bottom of this page will help you assess your understanding of these new terms.
Here I'll be discussing different processes used in the making of Ceramics, including my own examples, so you can get to know some of the terms used, you will also be able to test your knowledge using the Quizzes. Ceramic is Clay that has been fired high enough that it can no longer be recycled into wet clay. Ceramics is a field of art that contains many processes, Is labour intensive and time consuming, but with an outcome that is definitely worth it.
Unless otherwise stated photos are by Kayn
Unless otherwise stated photos are by Kayn
Slip
When joining pieces, the Scratch and Slip method is used to achieve a good bond which will not come apart. The edges which are to be joined are scratched to make the surface rough, and Slip (liquid clay), is used as a glue to join two or more pieces together. Slips can also be used to decorate and Terra Sigillata, popular with Greeks and Romans is a very fine slip sometimes used for a smooth surface.
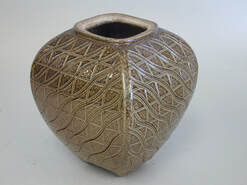
Burnishing - Pressure is applied to the surface in a circular motion usually with a smooth stone or spoon , this in effect creates its own fine slip, and aligns the clay particles for a smooth surface. Wax can be used after firing to polish
Burnishing - Pressure is applied to the surface in a circular motion usually with a smooth stone or spoon , this in effect creates its own fine slip, and aligns the clay particles for a smooth surface. Wax can be used after firing to polish

Scratch and Slip, joining ceramic pieces together
|
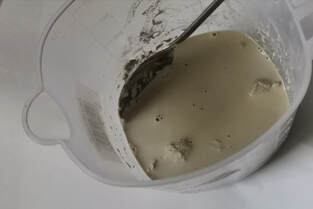
Slip (liquid clay)
|
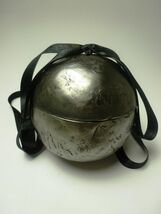
Burnished sphere container smoke fired , graphite used for silver effect.
|
Hand Building
Processed clay bought in a new bag is ready to use, but can be wedged to improve consistency of moisture.
Bags of workable leftover clay, and reclaim is wedged not only to combine, to improve consistency but also to remove air bubbles (see video)
Bags of workable leftover clay, and reclaim is wedged not only to combine, to improve consistency but also to remove air bubbles (see video)
There are different examples of Handbuilding.
Pinching - Pinch pots are made when Clay is squeezed between fingertips to create the required shape. (see video)
Coiling - Coils are made by hand (rolling) or machine (extruder) and used to create the form, the coils are spiralled creating height, most of the time the coils are smoothed out by hand but are sometimes left visible for the look. Extra Coils can be added by cutting the ends on an angle so they overlap for strength. When coiling scratch and slip can also be used to strengthen the bond between layers. (see video)
Slab Building - Flat slabs of clay are rolled out and cut to the required shape, they are left to stiffen slightly to allow for easier working without the clay sagging The pieces are then joined together using scratch and slip method to create the form.
Pebbles of clay or smaller pieces can also be used to handbuild with. "Nascent" below is an example where I used pinching to squeeze and flatten pebbles of clay, before joining them together, keeping the texture of the pebbles visible. This formed the vessels surrounding the hands and face which were also handbuilt by joining larger pieces of clay, modelling and shaping.
All work can be supported inside or outside while drying. Scrunched up newspaper makes a good temporary support. It is important that any supports can be removed and do not go in the kiln.
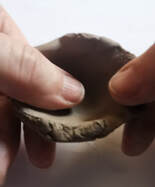
Pinching / A Pinch Pot
|
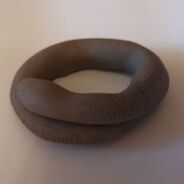
A coil of clay, this clay is too dry (small cracks appear when bending)
|
Slab Vase by Ruth King
|
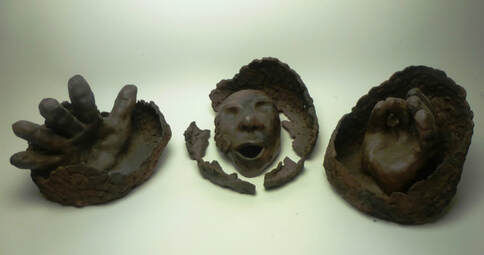
Nascent, by Kayn , Handbuilt, pinching pebbles of clay and joining together, smoke fired terracotta
|

|
Reference VideosAlthough you don't need to watch these to complete the quizzes on this site, they are a great way to further your understanding.
A Guide to Wedging Clay: Tips, Tricks, and Troubleshooting for Potters by KaransPotsAndGlass
https://www.youtube.com/watch?v=ZPwNAYvnK9w How to make pinch pot vases - easy, fun, and versatile handbuilding project by Still Life Ceramics
https://www.youtube.com/watch?v=8fwtUoMjB6s&t=383s 4 Coil Pottery Tricks Every Handbuilder Should Know by Andy Ward's Ancient Pottery
https://www.youtube.com/watch?v=vnQG2qA66_4&t=358s How to Make a Hand Built Box or Jar From a Slab Using a Template by Andrea Akerib Pottery
https://www.youtube.com/watch?v=lF7V1oCX1Pc&t=71s |
Mould Making and Slip Casting
Mould Making - Moulds are made of plaster. the item to be cast is prepared, using clay and usually in a temporary frame of Cottle Boards (left), the plaster is poured on, producing a reverse of the item (middle). Sometimes instead of cottle boards, a tube , typically of a flexible plastic sheet is used as a cylindrical wall in which to pour the plaster. Porous items need to be oiled first.
Because moulds absorb water they also need to be dried out in a gentle heat to avoid damage.
It is important there are no undercuts which could trap the item in the mould, damage the mould, and also the casts made from it. When making moulds with more than one piece, the first piece is coated with oil or soft soap before poring the second ,so that the two plaster pieces don't lock together. My most complicated skull mould has eleven parts. This assures the detail around the eyes, nose and mouth. Always consider how the item you are casting can be removed from the plaster, if it cannot without damaging the mould, neither will your clay cast.
Food starts to cook in the heat of the plaster curing. Making moulds of sea creatures is especially difficult, as they also begin to cook and are more complicated being squidgy. When working with some food/animal parts, It is advisable to start with one you have frozen earlier to give yourself a head start, (a lack of sense of smell or a strong stomach is also helpful).
Casting hands (or other body parts) is very popular. I would advise inexperienced mould makers, to cast a mould in alginate first and make a plaster version of the hand from which to make a two piece plaster mould from.
Health and Safety - Never attempt to make a one piece hand mould in plaster, your hand will be stuck as the plaster heats up and cooks your fingers.
Hair can also be stuck to and removed by plaster, so use vaseline or another coating (e.g. when using plaster bandages on a face to make a mask).
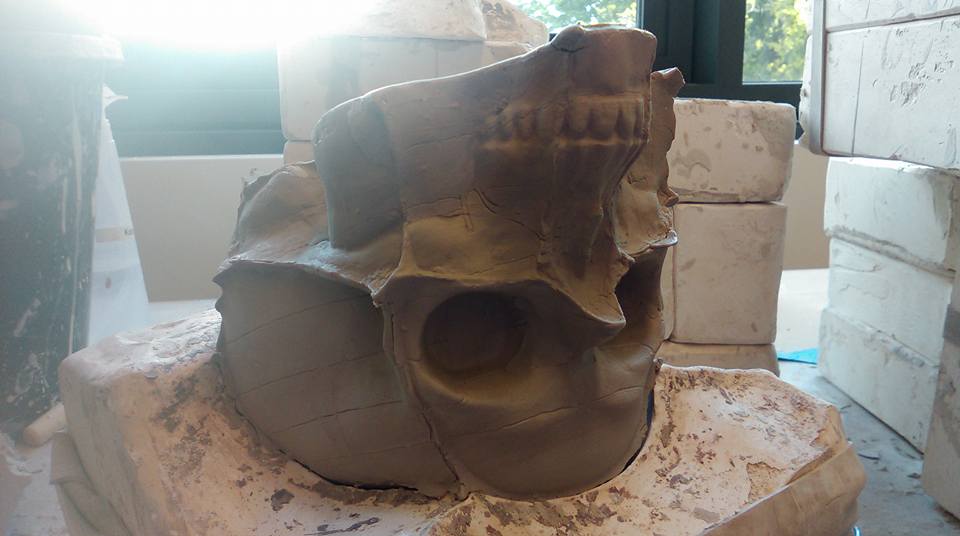
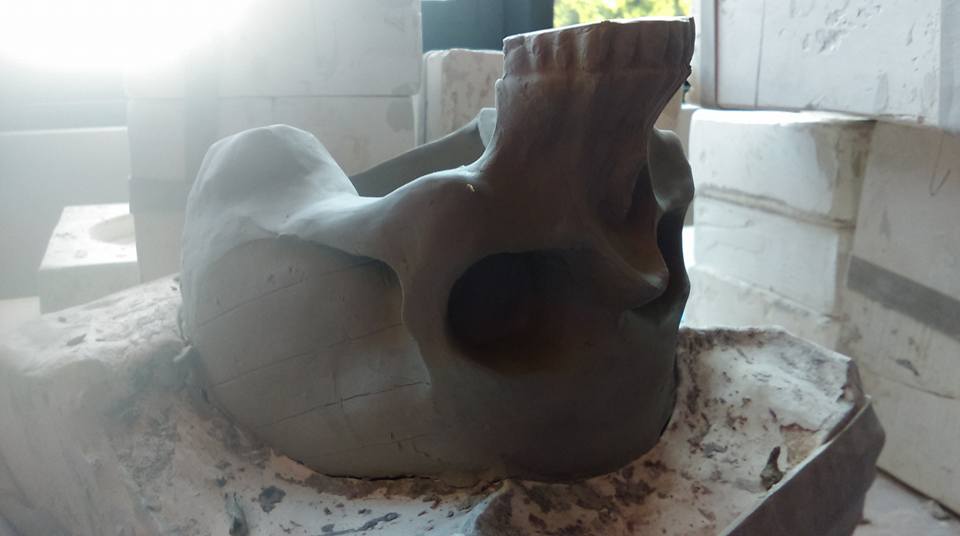
Slip Casting - Although i do hand build, My work is mainly slip cast , I make a plaster mould, (either from found objects or something i have hand built) into which i can pour slip (liquid clay). The clay forms a skin as it dries against the plaster and the excess slip is poured out when the thickness of the skin is enough (normally 10-20 min). The clay is then dried in the mould, until it is safe to take out (normally an hour), (right), at this stage they can be joined on to other pieces using (Some of my Hybrids contain six separate parts). If pieces are not left in the mould long enough they will be too wet and if they are left for too long they will dry and can crack. The edges which are to be joined together are scratched, and slip (liquid clay), is used as a glue to join two or more pieces together. The Scratch and slip method enables a good bond. Slip Casting allows for multiples to be made of the same piece.
Because moulds absorb water they also need to be dried out in a gentle heat to avoid damage.
It is important there are no undercuts which could trap the item in the mould, damage the mould, and also the casts made from it. When making moulds with more than one piece, the first piece is coated with oil or soft soap before poring the second ,so that the two plaster pieces don't lock together. My most complicated skull mould has eleven parts. This assures the detail around the eyes, nose and mouth. Always consider how the item you are casting can be removed from the plaster, if it cannot without damaging the mould, neither will your clay cast.
Food starts to cook in the heat of the plaster curing. Making moulds of sea creatures is especially difficult, as they also begin to cook and are more complicated being squidgy. When working with some food/animal parts, It is advisable to start with one you have frozen earlier to give yourself a head start, (a lack of sense of smell or a strong stomach is also helpful).
Casting hands (or other body parts) is very popular. I would advise inexperienced mould makers, to cast a mould in alginate first and make a plaster version of the hand from which to make a two piece plaster mould from.
Health and Safety - Never attempt to make a one piece hand mould in plaster, your hand will be stuck as the plaster heats up and cooks your fingers.
Hair can also be stuck to and removed by plaster, so use vaseline or another coating (e.g. when using plaster bandages on a face to make a mask).
Slip Casting - Although i do hand build, My work is mainly slip cast , I make a plaster mould, (either from found objects or something i have hand built) into which i can pour slip (liquid clay). The clay forms a skin as it dries against the plaster and the excess slip is poured out when the thickness of the skin is enough (normally 10-20 min). The clay is then dried in the mould, until it is safe to take out (normally an hour), (right), at this stage they can be joined on to other pieces using (Some of my Hybrids contain six separate parts). If pieces are not left in the mould long enough they will be too wet and if they are left for too long they will dry and can crack. The edges which are to be joined together are scratched, and slip (liquid clay), is used as a glue to join two or more pieces together. The Scratch and slip method enables a good bond. Slip Casting allows for multiples to be made of the same piece.
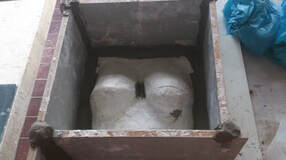
Image showing form in Cottle boards ready for plaster to be poured
|
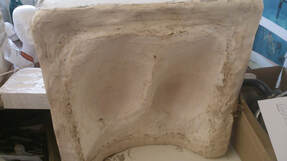
Image of one piece plaster mould
|

A series of moulds with clay slip cast pieces stiffening before being joined together
|
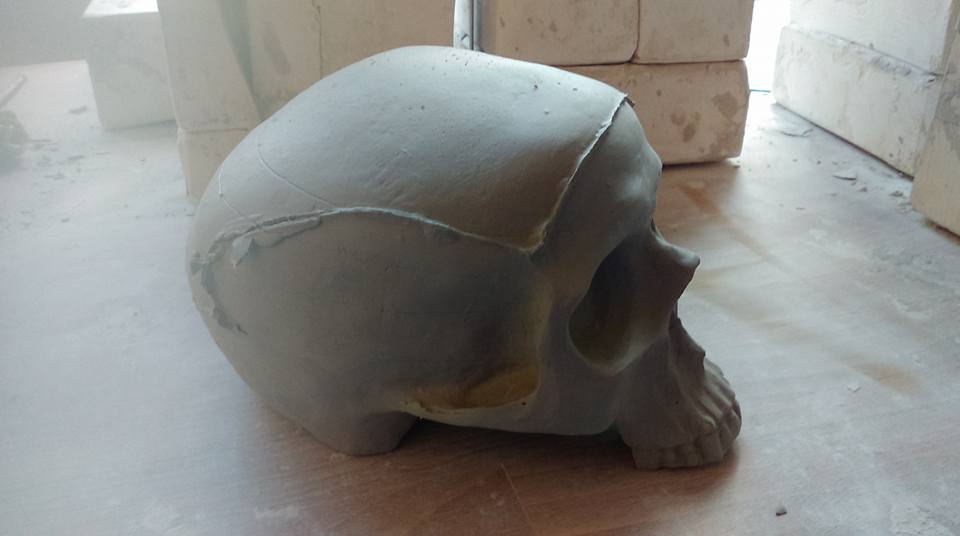
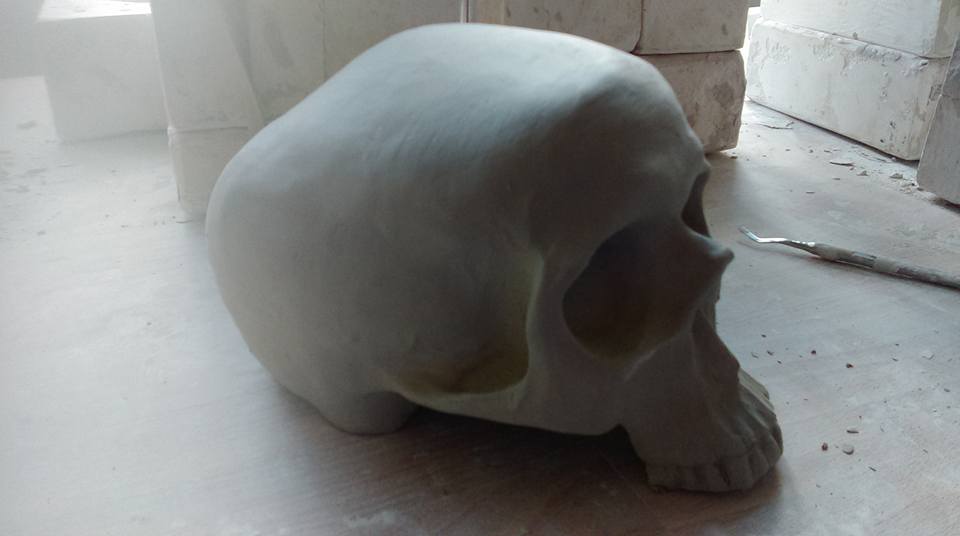
Fettling - Removing the seams from slip cast forms, tidying the surface.

|
Reference VideosAlthough you don't need to watch these to complete the quizzes on this site, they are a great way to further your understanding.
School of Art Demonstration: Slip Casting Functional Forms by The CADARN Learning Portal
https://www.youtube.com/watch?v=QC1Qp2wO2sE&t=712s |
Throwing
Throwing - Making a ceramic object on a potter's wheel. Most wheels are electric but manual momentum/kick wheels are still used.
Here is a highly illuminating and detailed article by Ivor Lewis ;
https://ceramicartsnetwork.org/pottery-making-illustrated/pottery-making-techniques/wheel-throwing-techniques/bowl-making-inversion-technique/#
Turning - Removing excess clay from a thrown vessel, this can give an improved surface / shape, it is also used to remove weight where clay is thick, and add details, like turning a foot ring into the base of a pot. Also described as trimming a pot.
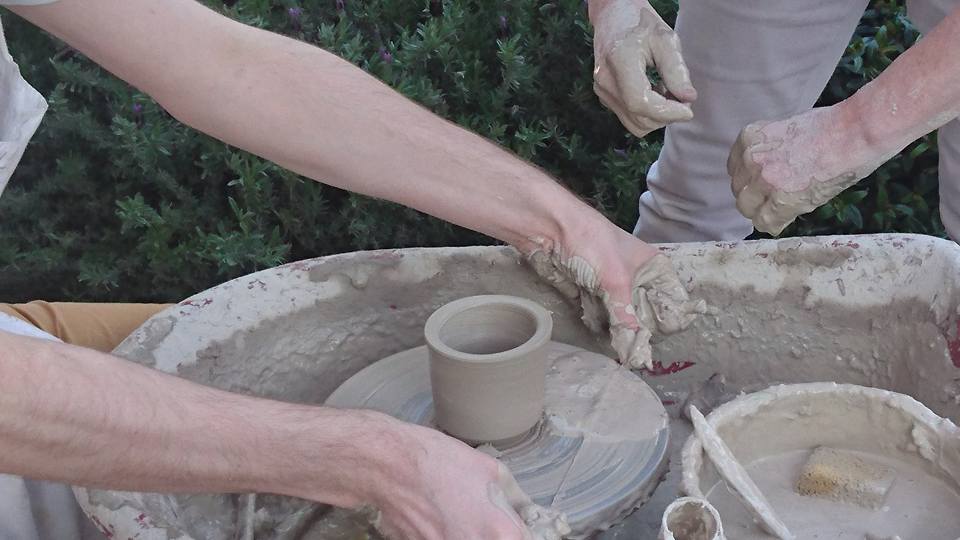
Throwing on a Pottery Wheel
|
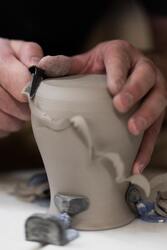
Turning excess clay from the base of a thrown pot
Photo by Courtney Cook on Unsplash
|
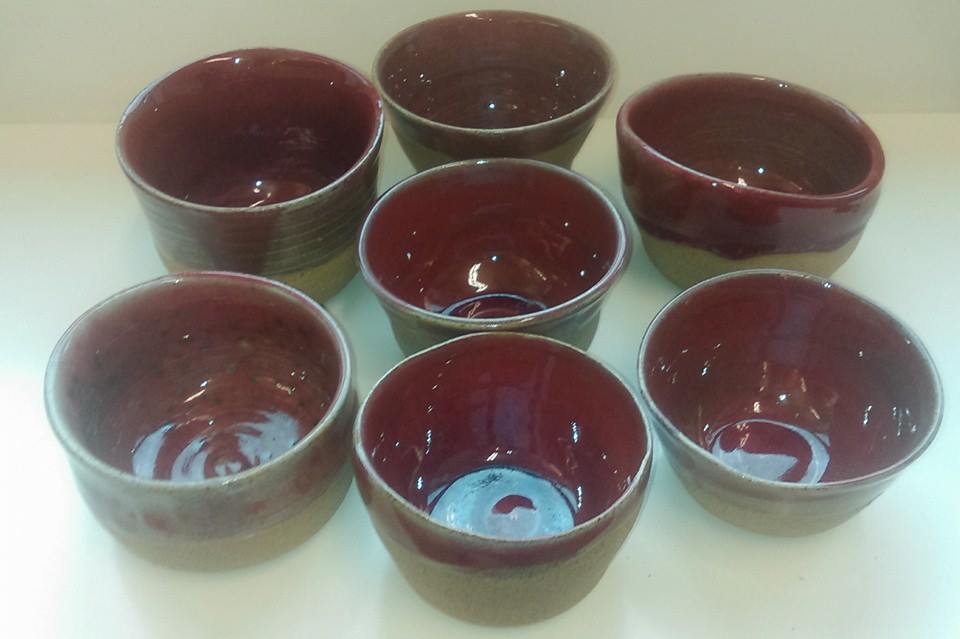
Wheel thrown bowls in a copper red glaze
|

|
Reference VideosAlthough you don't need to watch these to complete the quizzes on this site, they are a great way to further your understanding.
Trimming For Beginners + Tap Centering Trick by Earth Nation Ceramics
https://www.youtube.com/watch?v=hhtdYUMTNpc |
What have you learnt ?
Hopefully this will have given you a basic understanding of some of the processes in Ceramics, and a glossary of terms to describe them.
Can you remember what these terms mean ? If there are some you don't know go back and take a second look.
Can you remember what these terms mean ? If there are some you don't know go back and take a second look.
|
|

|
|
Reload the page to start the timer from zero

|
|
You can test your knowledge on processes further on the Quiz page, but make sure you go through the other pages first to learn some more new vocabulary.
